Back to Home
by Kyle Yoksh KØKN
Edited and put into repeater-builder
format by Mike Morris WA6ILQ

|
Up one level Back to Home |
Adding Anderson PowerPole Connectors to a Daiwa PS-304 power supply by Kyle Yoksh KØKN Edited and put into repeater-builder format by Mike Morris WA6ILQ |
|
In late 2007, I stumbled upon a great article by Robert Schulz KC6UDS detailing his clever modification of an Astron SS-30 power supply. The original supply has only one pair of set-screw-type binding posts for connecting radios and accessories, and it's a real pain to remove and replace wires with these stock connectors.
Robert noticed that his Astron had two knockouts on the rear panel that appear to be for an optional second set of set screw connectors. He found that four sets of Anderson Powerpole connectors could be installed in this location. I modified my own SS-30 in early 2008 and am very glad that I did. The Powerpole connectors are rated at 30 Amps per pair, so they are more than adequate for my purposes.
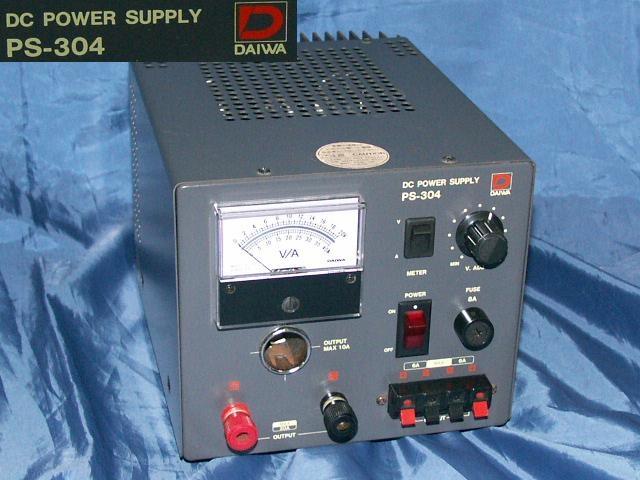
After performing the mod on my SS-30, I looked at the other power supply in my shack, a Daiwa PS-304 linear power supply. It originally featured two sets of spring-clips in addition to the 5-way binding posts. The spring clips were rated for a maximum of 6 Amps and always seemed to be a source of intermittent connections, etc.
The more I looked at the PS-304, the more I was certain that I could replace the lousy spring terminals with many sets of Powerpoles! Applying the same techniques used in the SS-30 mod, I found that six sets of Powerpoles would fit in my PS-304. Another option is to leave one set of spring clips in place, and to install three sets of Powerpoles in place of the other one.
Before you begin modifying your PS-304, I suggest you read the KC6UDS Astron SS-30 modification article all the way through.
I needed to use some sheet aluminum as spacers. Any home improvement or hobby store should have a good selection of sheet metal for a couple of dollars. As you can see in the picture, I used one spacer above the Powerpoles to take up the extra vertical space between the Powerpoles and PS-304 cabinet.
I also used spacers between the Powerpoles. although I found that there was not enough room horizontally for a spacer between each set of Powerpoles, so I fit the spacers as needed to keep the connectors straight, and also fill any remaining space in the opening. I tried to cut the spacers carefully, so that they fit very tightly in the cabinet. I do not want these metal pieces coming loose inside my power supply!
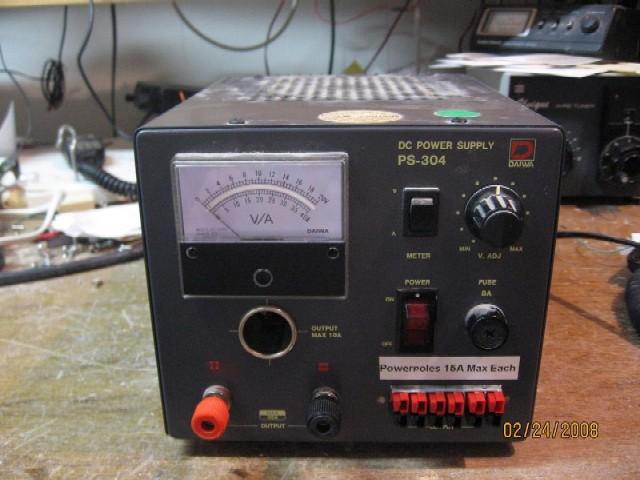
Once the connectors are fit tightly, apply liberal amounts of glue inside the cabinet to secure the spacers and all of the Powerpoles. Next, use a zip tie (or two) wrapped around all 6 pairs of Powerpoles to keep everything secured together.
After allowing the glue to dry overnight, I set to work installing the jumpers from the binding posts to the Powerpole connectors. As specified in the SS-30 article, I'd suggest using the largest wire you can comfortably use. I found that 12 AWG was about the largest gauge wire that could be crammed in the PS-304. In the interest of abundant safety, I rated my new Powerpoles at 15 Amps per pair.
Click on the photos below to enlarge them:
|
Acknowledgements and Credits:
Repeater-builder would like to thank Kyle for permission to clone his web page.
The original is on the KØKN web page
at http://www.qsl.net/k0kn/ then click on "Projects".
Contact:
Kyle Yoksh KØKN can be contacted at k0knXX //at// amsat //dot// org
but remove the XX before you hit "send". (The email address is disguised to prevent
spambots from picking it up.)
Back to the top of the page
Up one level
Back to Home
This page originally posted on 17-March-2008
Photos and article text is © Copyright 2008 and date of last update by Kyle Yoksh KØKN.
This web page, this web site, the information presented in and on its pages and in these modifications and conversions is © Copyrighted 1995 and (date of last update) by Kevin Custer W3KKC and multiple originating authors. All Rights Reserved, including that of paper and web publication elsewhere.