The PSE-702 stores its firmware in flash memory, which allows the system to be updated without requiring any change to the hardware on the board. Follow the directions in this document to update the PSE-702 firmware, for example, when PSE has released a new firmware version or when a firmware version that fixes a problem you might have encountered becomes available.
The latest version of the PSE-702 firmware is provided as a hex file that can be downloaded to the board using a tool provided by the micro controller manufacturer.
Before You Begin
You need the following before you begin the update process:
- A USB cable to connect the PSE-702 board to your
computer.

If you have not set up your USB connection to the PSE-702 previously, follow the instructions in the operator's guide section entitled "USB Port Communications Setup" to install an appropriate driver. You'll need the CD that accompanies the PSE-702. - The in system programming (ISP) jumper for the PSE-702 provided by PSE. When a PSE-702 is powered on with this ISP jumper in place, it enters programming mode.
- The "com" port number of the communication port that your computer uses to talk to
the PSE-702. How to determine which port the computer is using to talk to the board
- The hex file for the firmware version you wish to install on the board. The hex file can be downloaded from the PSE web site (www.pionsimon.com). How to download a hex file from the PSE Web site
- A copy of the FlashMagic tool on your computer. The tool can be downloaded for free.
How
to install FlashMagic on your computer
We recommend reading this document from start to finish before you begin.
Download new firmware for the PSE-702
The last version of firmware for the PSE-702 is available for download on this site.
- Right-click THIS FILE >> PSE-702_V3.3.hex <<. It's 379,196 bytes long.
- Click Save File... or Save Link As..., and then click OK. A dialog box will appear allowing you to choose the location to which you will save the file. Choose a location you will remember and have easy access to. The Desktop, for example, is a good choice. Click OK, and a progress bar displays while the download is in progress.
Not sure what version of firmware is already installed in your PSE-702? Here's how to check. How to check the version of firmware installed on your PSE-702
Install FlashMagic
Requires:
- Microsoft Windows 2000/XP/Vista/7
- 10Mb of disk space
- Software version:
- FlashMagic 6.01.2547 or later
If FlashMagic is installed on your computer, skip this section.
These instructions assume you accept the FlashMagic license agreement and the default locations its wizard proposes for the program and its files.
- Open your browser and go to this page http://www.flashmagictool.com/
- In the Download area, click on the link for flashmagic.exe. The Opening FlashMagic dialog box appears.
- Click Save File. The file will then be copied to your designated download destination.
- Go to the download directory, and double-click FlashMagic.exe. The Open Executable File dialog appears.
- Click OK. The Welcome to the FlashMagic Setup Wizard dialog appears.
- Click Next.
- Select the option I accept the agreement.
- Click Next, and then Next, and then Next.
- Click Install.
- Click Finish.
Connect PSE-702 to your computer
Using the USB cable, connect the USB port of the PSE-702 to one of the USB ports on
your computer.
If you have not set up your USB connection to the PSE-702 previously, follow the instructions in the PSE-702 Operator's Guide page 15: "2.3 USB Port Communications Setup" to install an appropriate driver. You'll need the CD that accompanies the PSE-702.
Determine the COM port ID
When you configure FlashMagic, you need to know the ID of the port that your computer system will use to communicate with the PSE-702.
- Click Start, and then Control Panel.
- Double-click System.
- Select the Hardware tab.
- Click Device Manager. A list of devices appears.
- Click Ports (COM & LPT). A list of COM ports that are in use
appears.
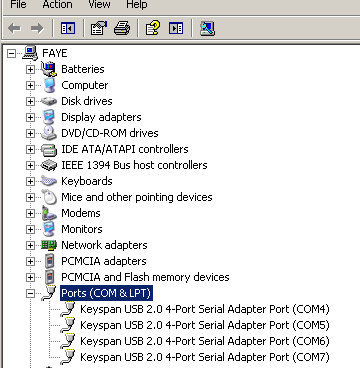
- Disconnect the USB cable for the PSE-702 from the computer. One of the COM ports will disappear from the list.
- Reconnect the USB cable. In a short time, the COM port ID for the cable will appear in the list. Make note of this ID.
Configure FlashMagic
Before FlashMagic can download new instructions to the board, it must be configured to talk to the PSE-702. You can do this once, and then save the settings so that they are available for use for future downloads.
- Run FlashMagic by selecting All Programs, and then
FlashMagic, and then FlashMagic. FlashMagic opens its
configuration dialog box.
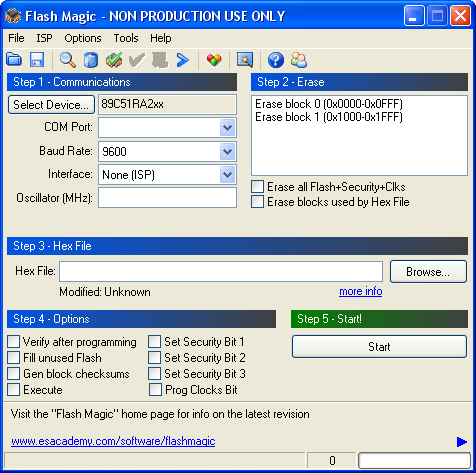
- Under Step 1 - Communications, do the following steps.
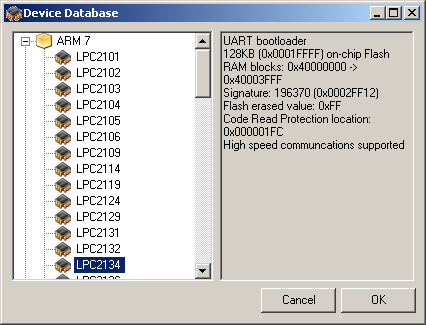
- Click Select Device. The Device Database list appears.
- Click Select Device. The Device Database list appears.
- Select ARM 7.
- Select LPC2138 from the list, and then click OK. FlashMagic returns to the configuration screen.
- Set the COM Port to the one that your system is using to connect to the PSE-702. See How to determine which port the computer is using to talk to the board
- Set the Baud Rate to 38400.
- Interface should be set to None (ISP). Confirm that this is set correctly.
- Set the Oscillator (MHz) to 12.
- Under Step 2 - Erase, do the following step.
- Select the option Erase all Flash+Code Rd Prot.
- Under Step 3 - Hex File, do the following steps.
- Click Browse.
- Navigate to the location of the hex file you downloaded, and then click Open. FlashMagic returns to the configuration screen and shows the path and file you selected in the Hex File area. How to download a hex file from the PSE Web site
- Under Step 4 - Options, do the following step.
- Select the option Verify after programming.
- Save the configuration settings so that you can use them for future downloads.
- Select File, and then Save Settings.
- Give the settings file a name.
- Select Save. FlashMagic saves the settings and presents a confirmation
message.
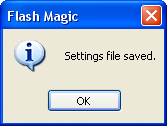
- Click OK.
To use a saved settings file to configure FlashMagic, follow these steps.
- Run FlashMagic.
- Select File, and then Open Settings.
- Choose the settings file you saved.
- Click Open.
Program the board
Follow these instructions to copy a new hex file to the PSE-702.
- Ensure the PSE-702 is powered down.
- Install the ISP jumper on the PSE-702 board.

- Apply power to the PSE-702. The board is now in programming mode.
- On the FlashMagic screen, go to Step 5 - Start, and click
Start. FlashMagic then copies the contents of the hex file to the flash
memory on your PSE-702 board and performs a verification process. This may take one or
two minutes. During the operations, progress messages and a progress bar appear at the
bottom of the configuration screen.
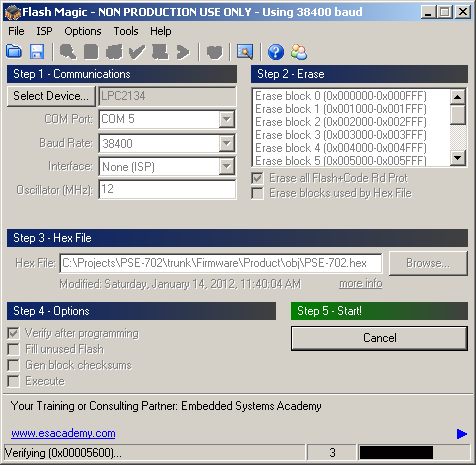
When the process completes, FlashMagic posts the message Finishedin the progress field.
- Follow the steps in the next section to confirm that the new instructions are loaded into the PSE-702's flash memory.
Check the PSE-702 flash memory
Use these directions to:
- Verify that new instructions have been downloaded to the PSE-702.
- Check the version number of the instructions loaded into the flash memory of a PSE-702.
- On FlashMagic screen, select Tools, and then Terminal.
The Terminal Settings window appears.
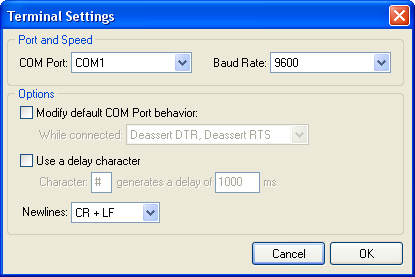
- Make sure the COM Port selection is correct for your system.
How to determine which port the
computer is using to talk to the board
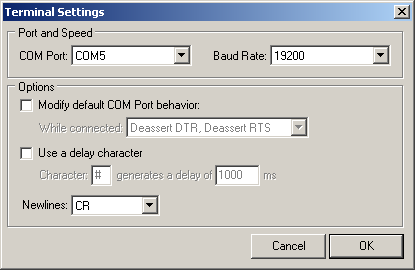
- Set the Baud Rate to 19200 baud.
- Set Newlines to CR.
- Click OK. The Terminal window appears.
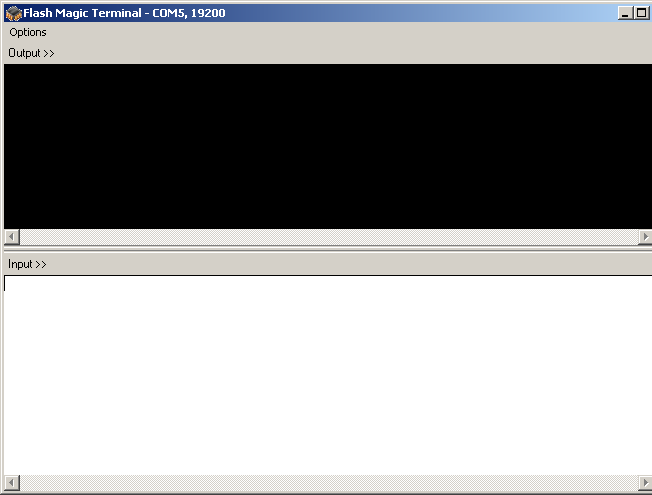
- Remove power from the PSE-702.
- Remove the ISP jumper.
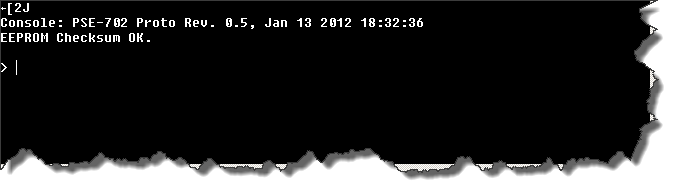
- Apply power to the PSE-702, and then press ENTER. The PSE-702 responds with a message
in the Terminal Output section that includes the version number of the instructions
currently installed in its flash memory.
Notes
The directions on this page assume your computer system uses the Microsoft Windows operating system, however, it is possible for new instructions for the PSE-702 to be downloaded using computers with other operating systems (such as Linux or MacOS). The basic process is similar, though FlashMagic tool setup and configuration (which will be based on Windows emulation) is different. Contact PSE Technical Support for more information.